This tutorial demonstrates how to build a data entry form using Oracle Forms. The example here is in UNIX environment, but the concepts and the steps are the same in other environments. The tutorial covers the following
If you have any questions or comments, please send them to Mahmoud
Youssef at the following email: youssefm13
at gmail dot com
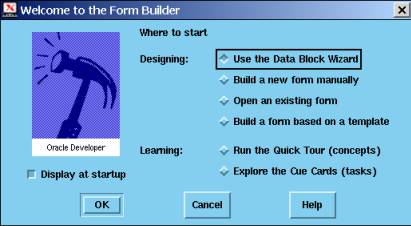
To
start
Oracle Forms in UNIX environment
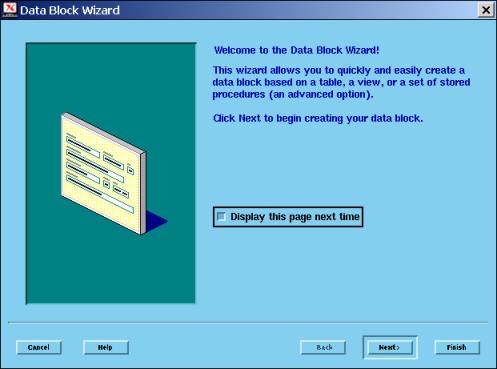
Building Data Blocks Using the Wizard
Select Table or View
Click Browse button to select a table
If you have not connected to the database during this session, you will be asked to connect. You will get the following screen
For this tutorial, select the DEPARTMENT table
Move all the columns to the right by clicking the >> button
Click Finish to move on to the Layout Wizard
The Layout Wizard
The layout wizard starts by the welcome screen unless you selected not to display it in a previous session
Since this is the first data block in the form, we will use a new Canvas
Move all the columns to the right and select Next
Change the width and height of the data items if you do not like the default values provided. Make sure it is large enough to hold the data.
Click Finish to finalize the data block. You will get the following screen (the Canvas)
Saving the form
To Save the form, select Save option from File menu, or press ctrl+s. The form will be saved in your home folder on pegasus with an extension .fmb
Compiling The Form
Since the form is actually a program, you have to compile it to make sure that there are no errors. To compile the form go the File menu, select Administration, then select Compile File. The shortcut for compile is ctrl+t. The compilation process produces a file with the same name and with extension .fmx
Notice that if you run the form without compilation, the run command will compile the form before running it.
Running the Form
To run the form, select Run Form from Programs menu or click the run form client/server icon (look like a light signal)
When you run the form you get the following screen. As you can see, Oracle Forms added a Menu Bar and a Tool Bar to your form automatically. These bars let you insert, delete, update, and query data in the database. Notice that you have to click the Save icon or Select Save option from Action menu to Commit the changes.
The Query interface is a query by example (QBE) where you can put values in the data items and perform query on them. You can also use variables or write your own Where clause.
Adding a Detail section (Creating a Master-Detail Form)
To add a detail section to the form, right click anywhere in the Canvas and select Data Block Wizard as shown in the next screen.
The data block wizard will take you through the same steps except that you will have an option to create a relationship between the existing table and the new table after selecting the new table. Since we selected Department Table as the Master table, we can select Employee as the detail table. Notice that Department table, the master table, is a parent table to the Employee table, the detail table.
When you select Employee table, move the columns to the right side, and select next you get the following screen
When you click Create Relationship button, you get the following screen
As you see the Foreign Key relation works a Master-Detail Relation. Click OK, then select DNO as the detail item and DNUMBER as the master item as shown in the next screen.
Continue the rest of the steps as before except the last step, instead of selecting Form, select Tabular, set number of rows to 3, and check the "display scroll bar box" as shown in the following screen
When you finish you should get the following screen
Running the Master-Detail Form
Run the form as before by clicking the "run form client/server" icon or by selecting run form from Programs menu.
Now, when you run any query in the Master table, the related rows are displayed in the detail table as shown in the next screen
List of Values
To avoid memorizing large number of values and to avoid errors in data entry, a List Of Values (LOV) can be attached to a field in the form. For example, in the next steps, we will attach the an LOV from the DNUMBER field in the DEPARTMENT table to the DNO field in the EMPLOYEE table.
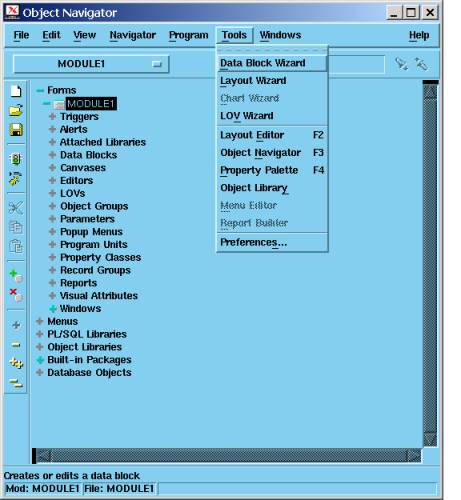
First, go to the Tools menu and select LOV wizard
Write a query to get the list of values as shown in the following screen. Notice that we are retrieving the values from the DEPARTMENT table although the LOV will be attached to a filed in the EMPLOYEE table.
Select the column to include in the record group
Click the "Look up return item" button
Select Employee.DNO
Click OK for the next step
Again, click OK
Select EMPLOYEE.DNO
Although we attached the LOV to DNO, it does not work unless you re-attach it from the object navigator
In the Object Navigator, select the field you want to attach a list of values to, right click that field and select Property Palette.
In the property palette select LOV and select the LOV you have just created as shown in the next screen
Using LOVs
When you insert data in the DNO field (while the form is running and in the normal mode, not the query mode), you can use the attached list of values by clicking ctrl-l in UNIX or F9 in Windows. You will get the following screen.